Previously, we configured volumes within the pod definition file, meaning all storage configuration information was included in each pod’s definition. Recall the example for the random number generation:
pod-definition.yaml
apiVersion: v1
kind: Pod
metadata:
  name: random-number-gen
spec:
  containers:
  - image: alpine
    name: alpine
    command: ["/bin/sh", "-c"]
    args: ["shuf -i 0-100 -n 1 >> /opt/number.out;"]
    volumeMounts:
    - mountPath: /opt
      name: data-volume

  volumes:
  - name: data-volume
    awsElasticBlockStore:
      volumeID: <volume-id>
      fsType: ext4
In large environments with many users deploying numerous pods, this approach becomes cumbersome. Users must configure storage for each pod individually, and any changes need to be made across each pod definition file.
Centralized Storage Management with Persistent Volumes
Persistent volumes (PVs) address this issue by allowing storage to be managed centrally. An administrator can create a cluster-wide pool of storage volumes, and users can then carve out pieces from this pool as needed through persistent volume claims (PVCs).
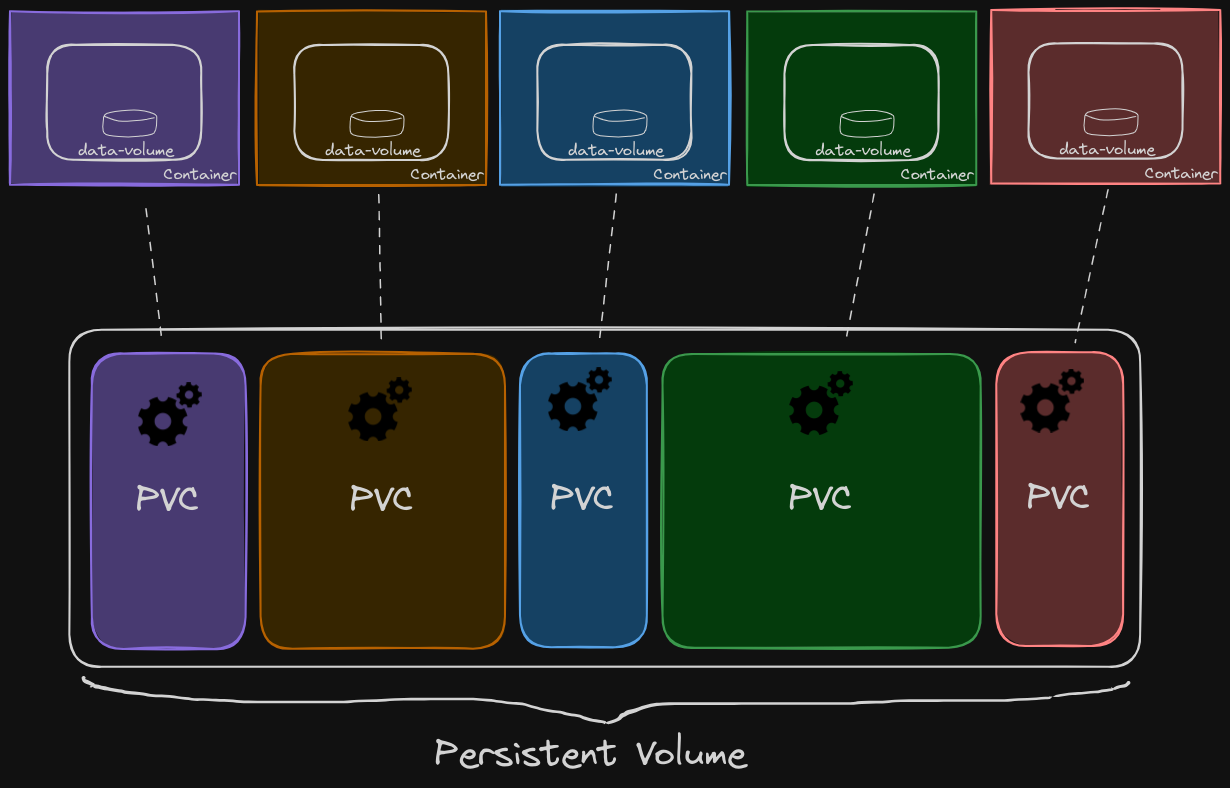
In this graphic, we can see the various storage volumes that pods are claiming from the central pool of persistent volumes, simplifying storage management and ensuring consistency across the cluster.
Creating a Persistent Volume
Let’s create a persistent volume (PV) step by step:
pv-definition.yaml
apiVersion: v1
kind: PersistentVolume
metadata:
  name: pv-vol1
spec:
  accessModes:
    - ReadWriteOnce
  capacity:
    storage: 1Gi
  hostPath:
    path: "/tmp/data
- Base Template: Start with the base template and update the API version.
- Set the Kind: Set the kind to
PersistentVolumeand give it a name, for example,pv-vol1. - Specify Access Modes: Define how the volume should be mounted on the hosts. Supported values are:
ReadOnlyMany: Multiple nodes can read from the volume.ReadWriteOnce: One node can read/write to the volume.ReadWriteMany: Multiple nodes can read/write to the volume.
- Set Capacity: Specify the amount of storage for the PV, e.g., 1 GB.
- Volume Type: For this example, we will use the
hostPathoption, which uses storage from the node’s local directory. However, this is not recommended for production environments.
To create and list PVs:
$ kubectl create -f pv-definition.yaml
$ kubectl get persistentvolumes
Using Supported Storage Solutions
Instead of using the hostPath option, which is not suitable for production, you can replace it with one of the supported storage solutions like AWS Elastic Block Store, NFS, or others. Here’s an example of using AWS Elastic Block Store:
pv-definition.yaml
apiVersion: v1
kind: PersistentVolume
metadata:
  name: pv-vol1
spec:
  accessModes:
    - ReadWriteOnce
  capacity:
    storage: 1Gi
  awsElasticBlockStore:
    volumeID: "<volume-id>"
    fsType: ext4
Conclusion
Persistent volumes allow for centralized storage management in Kubernetes, making it easier to handle storage needs in large environments. Administrators can configure a pool of storage, and users can request storage from this pool using persistent volume claims, ensuring efficient and scalable storage management.