In this post, we will look at networking in Docker. We will start with the basic networking options in Docker and then relate them to the concepts around networking namespaces. You will see how all of the networking concepts that we have learned up to this point apply to Docker networking as well.
Basic Networking Options in Docker
Let’s start with a single Docker host, a server with Docker installed on it. It has an internet interface at port 80 that connects to the local network with the IP address 192.168.1.10.
When you run a container, you have different networking options to choose from:
None Network
With a none network, the Docker container is not attached to any network. The container cannot reach the outside world, and no one from the outside world can reach the container. If you have multiple containers, they are all created without being part of any network and cannot talk to each other or to the outside world.
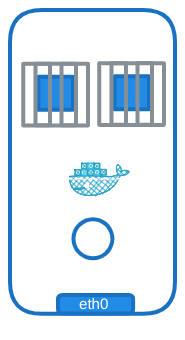
For example, you can create a Docker container with a none network like so:
$ docker run --network none nginx
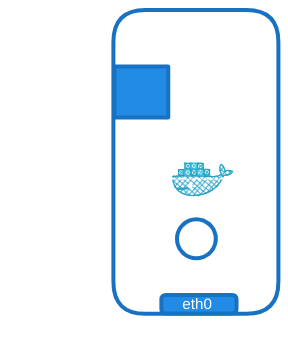
Host Network
With the host network, the container is attached to the host network. There is no network isolation between the host and the container. If you deploy a web application listening on port 80 in the container, then the web application is available on port 80 on the host without additional port mapping.
$ docker run --network host nginx
Running another instance of the same container that listens on the same port won’t work as they share the host networking, and two processes cannot listen on the same port simultaneously.
Bridge Network
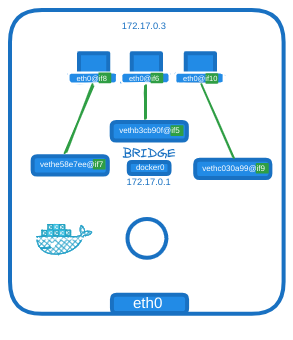
The third networking option is the bridge network. An internal private network is created, which the Docker host and containers attach to. The network has an address 172.17.0.0 by default, and each device connecting to this network gets its own internal private network address.
$ docker run nginx
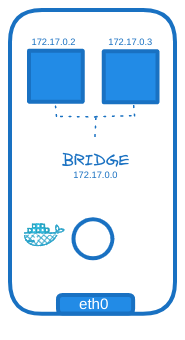
The bridge network is the most interesting network option, so we will take a deeper look at how Docker creates and manages this network.
When Docker is installed on the host, it creates an internal private network called Bridge by default. You can see this when you run the docker network ls command.

Docker calls the network by the name Bridge, but on the host, the network is created by the name Docker0. You can see this in the output of the ip link command.
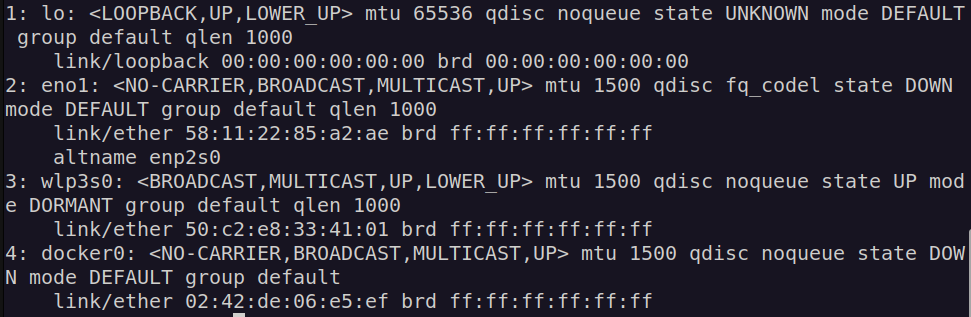
Docker internally uses a technique similar to what we saw in the post on namespaces by running the ip link add command with the type set to bridge. So, remember, the name bridge in the Docker network ls output refers to the name Docker0 on the host. They are one and the same thing.
Also note that the interface, or network, is currently down. The bridge network is like an interface to the host but a switch to the namespaces or containers within the host. The interface Docker0 on the host is assigned an IP 172.17.0.1. You can see this in the output of the ip addr command.

Whenever a container is created, Docker creates a network namespace for it. On Ubuntu, I had to run $ sudo ls /var/run/docker/netns to list the docker namespace. In my case, the namespace id was 9ba3541a137c.
If you want to be able to list the namespaces using the $ ip netns command, you need to create a hacky script to sync the docker namespaces with the linux namepspaces like so:
#!/bin/bash

# Ensure the /var/run/netns directory exists
sudo mkdir -p /var/run/netns

# Remove existing symbolic links
sudo find /var/run/netns -type l -exec rm {} +

# Link Docker network namespaces to /var/run/netns
for netns in $(sudo ls /var/run/docker/netns); do
  sudo ln -s "/var/run/docker/netns/$netns" "/var/run/netns/$netns"
  echo "Linked /var/run/docker/netns/$netns to /var/run/netns/$netns"
done

# Verify symbolic links
echo "Current symbolic links in /var/run/netns:"
ls -l /var/run/netns
You can see the container-namespace association by first using $ sudo docker ps -a to get the container id. In my case, the container id was bc143c876703.
From there, you can see the namespace associated with each container in the output of the docker inspect command. There is a lot of information given by this command, so you can also pipe and grep by the namespace id to see that it is associated.
$ sudo docker inspect bc143c876703 | grep 9ba3541a137c

Attaching Containers to the Bridge Network
Going forward, when I refer to containers, I’m referring to the network namespace created by Docker for that container. So how does Docker attach the container, or its network namespace, to the bridge network?
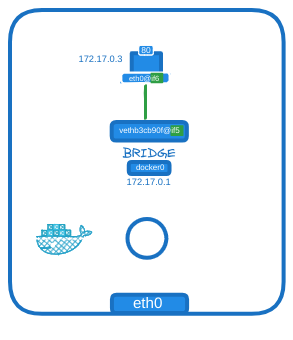
As we did before when we connected namespaces virtually, Docker creates a virtual cable with two interfaces on each end. If you run the ip link command on the Docker host, you see one end of the interface (in my case vethb3cb90f@if5) attached to the local bridge, docker0.
$ sudo ip -n 9ba3541a137c link

If you run the same command again with the -n option with a namespace, it lists the other end of the interface within the container namespace.

The interface also gets an IP assigned within the network. You can view this by running the ip addr command within the container’s namespace.
$ sudo ip -n 9ba3541a137c addr
The container gets assigned 172.17.0.3. You can also view this by attaching to the container and looking at the IP address assigned to it that way.

The same procedure is followed every time a new container is created. Docker creates a namespace, creates a pair of interfaces, attaches one end to the container and another end to the bridge network. The interface pairs can be identified using their numbers. Odd and even numbers form a pair (e.g., nine and ten are one pair, seven and eight are another, eleven and twelve are one pair). The containers are all part of the network now and can communicate with each other.
Port Mapping Overview
Let’s dive into port mapping. We have an Nginx container serving a webpage on port 80. By default, this container is in a private network, meaning only other containers in the same network or the host itself can access the webpage. If you use curl with the container’s IP from within the Docker host on port 80, you will see the webpage.
$ curl http://172.17.0.3:80
However, accessing the webpage from outside the host will not work.
To make the web application accessible to external users, Docker offers port publishing or port mapping. When running the container, you can map port 8080 on the Docker host to port 80 on the container.
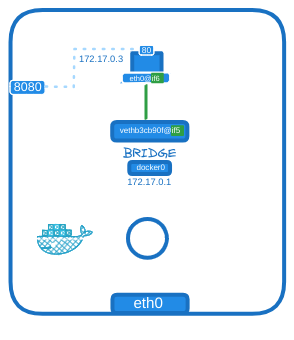
This setup allows you to access the web application via the Docker host’s IP on port 8080. Any traffic sent to port 8080 on the Docker host is forwarded to port 80 on the container. Consequently, external users, applications, or servers can access the application deployed on the host using this URL.
How Docker Forwards Traffic
To forward traffic from one port to another on the server, we use Network Address Translation (NAT) rules. By using IP tables, we can add an entry to the NAT table, appending rules to the prerouting chain to change the destination port from 8080 to 80.
$ iptables \
        -t nat \
        -A PREROUTING \
        -j DNAT \
        --dport 8080 \
        --to-destination 80
Docker follows a similar process. It adds a rule to the Docker chain and includes the container’s IP address as the destination.
$ iptables \
        -t nat \
        -A DOCKER \
        -j DNAT \
        --dport 8080 \
        --to-destination 172.17.0.3:80
You can view the rule Docker creates by listing the rules in IP tables.
$ iptables -nvL -t nat